Unexpected Business Strategies That Aided Small Built In Microwave Achieve Success


How to Choose the Best Small Built in Microwave
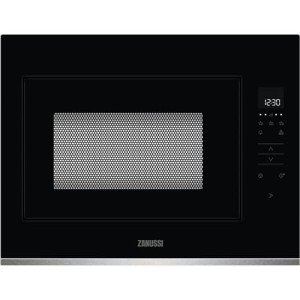
A microwave that is placed in a cabinet or under your counter frees space on your counter and creates a seamless look. Installing them at a comfortable level and near other appliances, such as the wall-mounted oven is simple.
Choose from small built in microwave of door designs, including right-to-left swing-out or drop-down models that open the same way as a drawer in a cabinet. Think about other options, too.
Capacity
Microwaves are available in various sizes and capacities that can be a perfect fit for any kitchen. Find countertop, compact and low-profile microwaves as well as built-in models to find a model that suits your space. These models can help you cut down on meal time by incorporating features such as sensor cooking and a slim trim kit that helps save counter space. Some models also have a retractable turntable to make loading and unloading dishes much easier.
When shopping, take into consideration the size of your family and if you'll be using the microwave to cook larger items, such as platters or casseroles. You'll need a bigger capacity microwave to handle these larger items. For instance a 2.2-cubic foot model from Frigidaire can accommodate large platters and plates for dinner.
Another crucial aspect to consider when selecting the right microwave is its power level. You should look for models that have higher wattage that cook food faster and more evenly. Some microwaves have different power settings, which means you can adjust the heat output based on the food you're cooking.
The dimensions of microwaves vary based on the type, and typically include exterior width, height, and depth, along with the capacity inside. When shopping, exterior sizes are helpful because they provide an idea of what to expect. However, the capacity inside is usually listed separately on each product page and can be more efficient in determining which model is suitable for your home.
The interior space of small built-in microwaves differs from model to however, most will have an overall diameter of 24 inches with the door closed. Widths may be a little smaller to fit standard cutout sizes for cabinets and match models from over-the-range. Models differ in both height and depth but all must be installed at least 12 inches above the stove to allow for ventilation.
Find the area where you would like to put the microwave in and clear any obstructions. Make sure that you leave at least 1 inch space between the wall and the microwave to allow for ventilation, and 3 inches between the countertop's edge and the doorway to avoid tipping.
Design
It is essential to think about the overall design of the kitchen and how the appliance will be incorporated into the kitchen when selecting the most compact built-in microwave. There are a variety of ways to integrate the appliance into the kitchen. These include placing it on a wall, putting it under the countertop in a drawer arrangement or even in the cabinetry. This way the appliance can blend into other kitchen appliances and give a seamless, integrated look.
The style of the door is also important. Many microwave models have a swinging door that swings from left to right, drop down doors or drawers. These options allow people of any height to easily access the appliance, and also help to save space on the countertop. In addition to these practical features, certain microwaves feature high-end features that can add the look and feel of a luxury to the kitchen.
It is also essential to remember the amount of wattage that will be required to cook certain meals. The back of many microwaves will display the power rating. A model with higher wattage will allow for quicker cooking and reheating. There are models with lower wattage ratings that are more energy efficient. However, they will take longer to cook or heat food items.
Installing a small microwave in an existing cabinet is among the easiest ways to incorporate it. They are available at a variety of price points and are able to be placed right against the cabinet for an elegant look. It is essential to read the instruction manual and owner's manual for the microwave you are considering.
Installing the microwave on the wall is a different option. This can be done in a pantry or nook. This will give the kitchen a neat sleek appearance that will help open up the Kitchen. A professional Kitchen Designer will work with a homeowner to determine the most appropriate location. It is essential to keep in mind that the microwave must have enough air space on both sides and back to work effectively.
Power
Microwaves can be used to perform many tasks quickly and efficiently. The power of microwaves is measured in watts and this will affect the speed at which it cooks food. In general, microwaves with higher watts can heat food faster and more efficient than microwaves with lower watts.
In contrast to freestanding microwaves and built-in models are installed within the cabinets of your kitchen, and this provides them with a sleek look that seamlessly blends in with the rest of your appliances and space. You can also find built-in microwaves that take up less space, but still provide enough space inside for tall glasses and wide dishes.
You can also select from a wide range of options for control that make cooking and heating food much more simple and convenient. For instance, you can opt for models with sensor-cooking technologies to make mealtime even more simple. Other features include doors that can be opened with a tap and a slim, sleek design that makes them easier to fit into tight spaces.
Installation
Microwaves that are built into the cabinets and island structures offer a streamlined look that eliminates the appliance from your countertops, allowing valuable counter space. These models require professional installation but permit you to be more creative with the design of your kitchen. They also consume less space than freestanding microwaves, making them easier to fit into tight spaces or corners.
Check the instructions supplied by the manufacturer prior to installing your new microwave. This should provide you with information on the amount of space needed for ventilation as well as what materials and tools are needed to make the installation successful. Based on the type of home, your electrical system may need to be altered for installation. If you plan to install the system yourself, turn off the power to your home before starting work.
Remove any decorative trims from the cabinet that may hinder the microwave from being placed correctly. Make sure that the countertop is free of obstructions and there are no other appliances within the space. Use small built in microwave to locate wall studs underneath the cabinet in which you intend to mount the microwave. You can tap the wall with a hammer in order to locate studs. If you can hear a solid sound, you've found the stud. Once you've identified the locations of wall studs, mark them off with a pencil and a level. If your microwave included an old-fashioned cardboard template, place it over the upper cabinet, to serve as a reference for drilling holes for the mounting plate.
Most microwaves designed for recessed mounting or inside cabinets come with venting systems that work with enclosed spaces. They will tell you what to do for proper venting, including raising your unit by a few inches or directing ventilation tubes along the exterior wall or cabinet.
When installing a built-in microwave make sure that a person is holding the appliance while you attach it to the wall. Screws that are able to support the weight of the microwave are recommended, like lag screws (also called toggle bolts). These screws will hold the plate that is mounted to the wall. The power cord can be pulled through a hole that has been specifically drilled for this purpose.